Trying to throw a knife can be a daunting task for a beginner. You may try and try, but the knife just won’t hit the target, and it won’t stick even if it does. Well, there is a reason for this, and that reason is that you are probably doing it wrong.
Learning to throw a knife is not that difficult. However, mastering the craft is, and would probably require, at least a few hundred hours to do so. That shouldn’t be daunting to a beginner, as learning is a part of the fun.
Pro Thrower Tip: One of the biggest bits of advice I could give when getting into throwing knives is to learn to enjoy the process. You’re not going to hit the bullseye every time. That’s okay!
This guide is a complete overview of what you need to know before you throw a knife, the correct technique, and how you can eventually perfect the art of knife throwing. Let’s begin by making sure that you have the correct knife.
There’s not a lot much money in knife throwing, so IKTHOF is reader supported. This page may contain affiliate links so we get a small advertising fee for any purchases.
Picking a Beginners Throwing Knife

I have seen some practice throwing knives on the market, but, for the most part, my general advice is to start with a good knife, to begin with. You might as well learn knife throwing with a comfortable weight and size, to begin with.
You do want to avoid some of the more fragile blades, however. Beginners are more likely to break their tips (especially while trying to find their throwing style), and that’s why we cover the best beginner throwing knives separately.
Going for the most premium and expensive knife is not always a good idea if you are a beginner. For one, many knives are designed with competitive throwing in mind. As such, they often have a learning curve that may make them difficult to pick up for a beginner.
Secondly, you are much more likely to break your knife as a beginner. It will miss the target regularly and come into contact with other services that may be a lot harder than your target board. As such, it will scuff and be damaged. While expensive knives do not break as easily as cheap ones, that is only true when they are not being used improperly. Since you won’t initially know what the proper manner is, purchasing them is a waste of money. Lastly, many quality knives can be had for a modest price.
How Does a Throwing Knife Differ From Other Knives
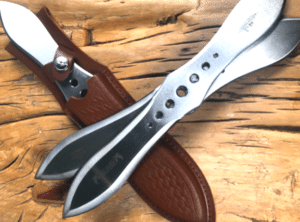
There are various kinds of knives, but a throwing knife is very specific. Please don’t start throwing your kitchen knife around. These are balanced knives that are designed to stick to a target.
Some of the best throwing knives won’t even cut a piece of paper.
Unlike a hunting knife or a survival knife, the knife blade on a throwing knife is not sharp apart from the tip. The edged blade allows you to stick the knife on any surface you want, but it also allows you to hold the knife from the handle.
Throwing knives also have a streamlined shape so that they move better during spin throws. On top of that, each knife is almost completely unique due to its different weight, shape, and size. This allows for a lot of variance in the experience.
What to Look For in a Beginner Knife
Part of this is personal preference and finding the knife that fits your style. Part of it is avoiding some of the low-quality knives that don’t throw straight. Here is a list of things to watch for when picking a knife for the first time.
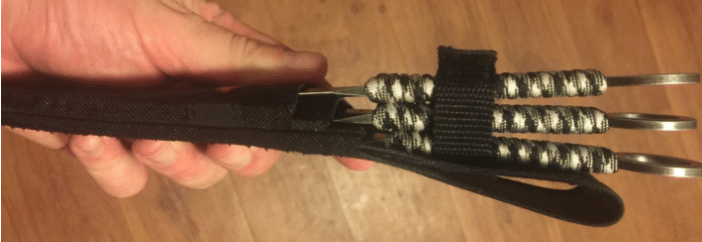
- Decide whether you want a cord grip or a standard steel handle. If you have access to both, try them out and see which knife grip you like best. Avoid fancy grips that cost a lot. You can’t make use of them anyway.
- Decide whether you want to begin with lightweight or heavier knives. The best way to do this is to take a look at your physique and strength. People in their early teens or those that are of a lean build should opt for lighter knives.
- Make sure that you take all safety measures into account. Purchasing a mini first-aid kit along with your knife is a good idea.
- If possible, try to purchase two packs of three knives (a total of six). Chances are that some of your knives will break, so having extra cannot hurt.
- Opt for a balanced throwing knife in the beginning. You can switch to a handle-heavy knife or a blade-heavy knife after you have mastered the basics. A balanced knife will help you learn faster.
An Easy Recommendation: The Kershaw Ion

The Kershaw Ion is a great knife for beginners. While it is a little too lightweight, getting started on the Ion can allow novice knife throwers to pick up on all the nuances that exist in the sport. It is also reasonably cheap, allowing you to easily replace the knife if it breaks.
For something in a different style, you might also consider getting the Uzi throwing knife set.
Picking a Throwing Knife Target

This part deals with picking and setting up a throwing knife target. While you can use trees (and many do), they are not usually ideal targets. Many trees are simply too hard and have the potential to destroy or damage your knives. While I have personally tested knives against trees, and many professional knife throwers use trees for practice almost explicitly, it is best that you avoid them until you are an advanced knife thrower.
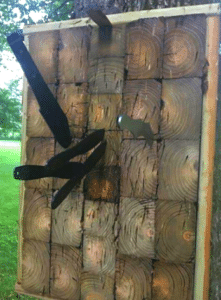
Planks are usually a great target. As long as they are of the appropriate thickness (at least 30mm, although more is always better), they work great as targets. Apart from that, something with soft wood like pine is also great for making a throwing knife target.
While you can make your own target, it is easier to purchase one if you have the money.
A Note on Safety
Make sure that no one is standing close to the target before you throw the knife. It is easy to make mistakes as a beginner, and throwing knives have the potential to seriously harm someone.
Moreover, indoor usage should always be done in a carpeted room. It is very easy for knives to bounce off surfaces and fly off the handle (so to speak). Also, make sure that no one is standing close to the wall where the knife is most likely to strike, as ricochet injuries can pack more of a punch than you’d expect.
A lot of venues (and competitions) ask for some sturdy footwear. You don’t need to wear a bulletproof vest – but don’t show up in sandals.
Please respect this side of things. Especially with beginners or a different style of throwing knives, it can be hard to judge the release properly, and you don’t want one of these knives going in your direction.
There’s an old saying with experienced knife throwers: a returning knife has no handle. Don’t try and catch a knife that bounces.
Knife Throwing Techniques
There are innumerable knife throwing techniques, each of them a variation of another in some way. Here, we will look at the three most common ones that are usually used as a basis for all others.
The Half-Spin
The half-spin throw is the easiest technique to learn. You grab the knife by the blade and throw it in a standard fashion. The half-spin throw is ideal for short distances. There are many variations of this, which we will not go into here.
The Full-Spin
The full-spin throw is not as easy as the half-spin, but it looks a lot cooler. You grab the knife by the handle, measure the distance to the target, and apply the appropriate force. A full-spin throw is a lot more accurate, but it’s not as fast as the half-spin.
The No-Spin
The “no-spin” technique is exactly what the name suggests. You hold the knife from the handle with your index finger on the side of the knife. The motion of the no-spin throw is quite similar to cocking and shooting a bow and arrow. Its biggest advantage is that the technique is quite similar no matter what the distance to the target.
How to Hold and Throw a Throwing Knife

So, now that you know what you have to do before you throw a knife let’s take a look at the process of throwing the knife itself.
Posture and Form
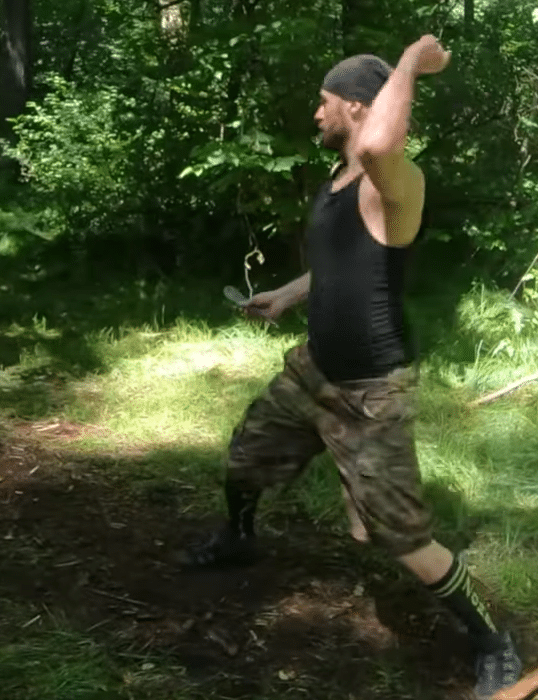
A proper stance helps set you up for the perfect throw. A relaxed body is a must for knife-throwing. If you are someone that caves in to pressure, it might be better to throw alone the first few times.
Some like to take one pace forward as they throw, while others prefer to start with their dominant front foot one step ahead. Slightly bend your left foot slightly and keep your shoulders square to the target.
You might need to practice a little to find the footing that works for you.
Stand up straight with one foot in front of the other. For the hand that you are going to throw with, the same foot is going to be upfront (for example, left-handers should have the left foot forward).
Most throwers will use their dominant hand as muscle memory forms a lot easier, but I do know at least one professional thrower who uses her non-dominant hand.
Avoiding Force (Biggest Mistake)
One of the biggest mistakes I see beginner throwers make is trying to use too much force.
If your knife doesn’t stick or bounces off the target wood, the problem is most likely that your knife is not landing properly on the tip. A more powerful throw adds more unpredictability (as well as a greater chance for injury or damage).
You can add more force later as you get a feel for the different techniques. A big part of learning how to throw a throwing knife is learning how not to throw it.
Stick to One Knife
I’ve been guilty of this in the past. There are a lot of fantastic-looking throwing knives out there, and many of us have an ever-growing collection. There’s nothing wrong with this.
But knife throwing is about repetition. Getting used to the weight, where the tip is and how your knife sticks to the target are important. It can be tempting to get into the sport and keep buying knives but you’ll progress much faster if you stick to just one.
The Three Grips
Remember that the way you hold the knife is the most important aspect of success. Eventually, you will be able to aim well enough. However, a bad grip will never allow you to throw perfectly and consistently.
Let’s look at the three most commonly used grips.
- Hammer Grip: Grip the knife the way you would a hammer. Place the handle on your palm and wrap your fingers around the knife with your thumb on top. Remember not to grip too tightly, as it will only lead to problems when releasing the throw.
- Pinch Grip: Here, the thumb rests on top of the blade on one side, with your fingers supporting the blade on the other. Make sure the handle is pointing outward (away from you) and the blunt end is facing toward your palm. The tip of the knife should be in line with the bottom of your thumb, with your thumb directed up the blade toward the handle.
- Slider Grip: This is one of the grips used when trying to perform no spin throws. Place the knife perpendicular to the palm of your hand, and place your thumb across the knife to hold it.
- The McEvoy Grip: This is a more specific type of grip and not one I’d tend to suggest beginner throwers start with, so let’s call it an honorable mention. Here, the thumb goes along the spine of the throwing knife.
How to Throw a Half-Spin
To perform a half-spin throw, hold the knife in a pinch grip, with the blade facing you and the handle pointing upwards. The ideal distance for a half spin is between five and seven feet for a beginner. Once you have properly lined up the knife with your target, bring your arm forward while twisting your wrist toward the direction of the spin.
The half spin, while the most accurate throw, cannot be used at longer distances due to lack of power. For that, the full spin is preferable.
How to Throw a Full-Spin
For a full-spin throw, stand around ten feet away from your target at the beginning. Here, a hammer grip is usually preferable. The blade should be facing upwards, with the handle facing you. Similar to the half-spin, bring your arm back behind your shoulder and then move it forward while twisting your wrist. Remember that when throwing from longer distances, you can also move your body forward along with your arm to inject more power into the throw.
It is also important to remember that the full-spin throw is a lot more advanced than the half-spin. As such, it will take you a lot more time to learn it properly. It is better to first master the half-spin before moving to the full-spin.
How to Throw a No-Spin
For the No-spin, you can use the slider grip. Place the knife in your palm like a hammer grip. This time, however, you will move your index finger to line up on the side of the knife. Then, pull the knife back (as if you are cocking an arrow on a bow). By the time you have pulled back completely, the blade should be pointing almost completely upward. Then, bring your arm forward and release, but don’t twist your wrist in the process. The no-spin throw can be performed at any distance and can be extremely accurate once you have mastered it.
Performing Advanced Throws
Advanced throws are usually either a variation of the throws already mentioned or utilize a higher number of spins. As you get better at throwing, you will begin to develop a knife-throwing ‘common sense that will allow you to gauge the right distance for the number of spins you are trying to perform. The technique itself will remain the same as a full spin throw, with the power and the arm motion varying.
If you find that you are unable to hit the target with the blade (the handle hits it instead), don’t try to change the force with which you throw. Instead, either try changing the movement of your wrist during the throwing motion or move one step forward or backward (depending on which throw you are trying to perform. For example, if you are aiming to perform a full spin and falling short, taking a step back to allow more room for rotation is a good idea).
Where to Practice Knife Throwing
Before I answer this, I should point out that your local laws might matter here. I can’t personally throw knives in a local park, but I can practice in my back yard. I know some practice on their own land or even indoors.
Realistically, with a large enough piece of wood to stop your knife from flying towards the wrong target or bouncing anywhere, knife throwing is relatively safe, but you do need to practice proper precautions.
Many axe-throwing venues will also have some throwing knives to practice with, although the staff often seem to be less knowledgeable and will push you towards axe-throwing instead. Depending on their insurance rules – they might let you bring your own equipment, but it can help to call ahead first.
Practicing For Competitions
If you are someone who plans to participate in throwing knife competitions, it is imperative that you only practice what you are going to need. Knowing a ton of styles and techniques will not win you any competitions, but mastering the few that you know will.
A good rule of thumb is to find the technique and the distance from the target your local competitions use and stick to these rules for your practice session.
Competitions generally only go up to two-spin throws. As such, trying to do anything beyond that should come under the leisure category instead of honing your craft for the next tournament.
Knife Throwing Distance
Hitting the target from a long distance is always fun. However, it will be a while before you can perform the accurate and powerful throws to do that. The standard distance for a single spin throw is around 10 feet, and that is where you should begin. The same distance also works for most other styles.
As you slowly become proficient in knife throwing and begin to understand how to perform advanced throws, you can move back and increase the throwing distance if you wish. Your goals of knife throwing should determine the distance you use. If you are hoping to participate in a competition, then the distance used by the competition should be the distance you use. If your aim is to be as good a thrower as possible, you can pretty much pick and choose the distance and technique to your liking.
A Lifetime to Master
No matter what throwing technique you choose, how many knives you buy or how much you enjoy the sport, there’s always more to learn.
A professional thrower is constantly practicing and once you tackle things like the bad form beginners often find themselves in – inconsistent throwing practice is the biggest issue you need to contend with.
Joining a local throwing group is a great way to learn from people with different experiences and styles and get entering competitions! You don’t need to be professional to go along and have some fun.
Table of Contents

